
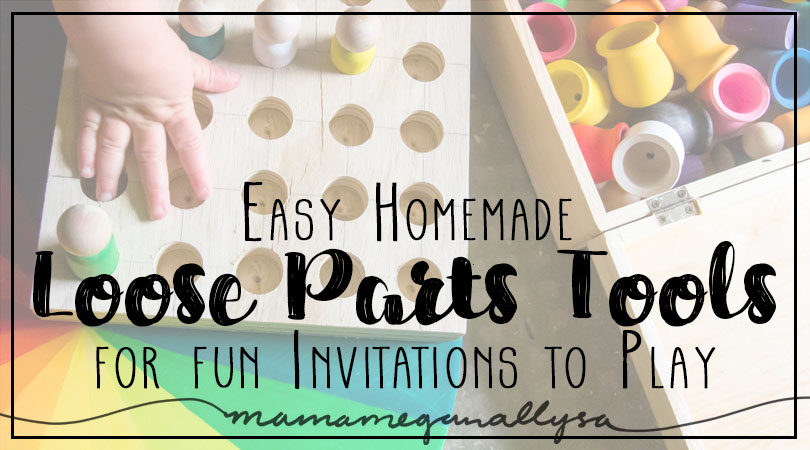
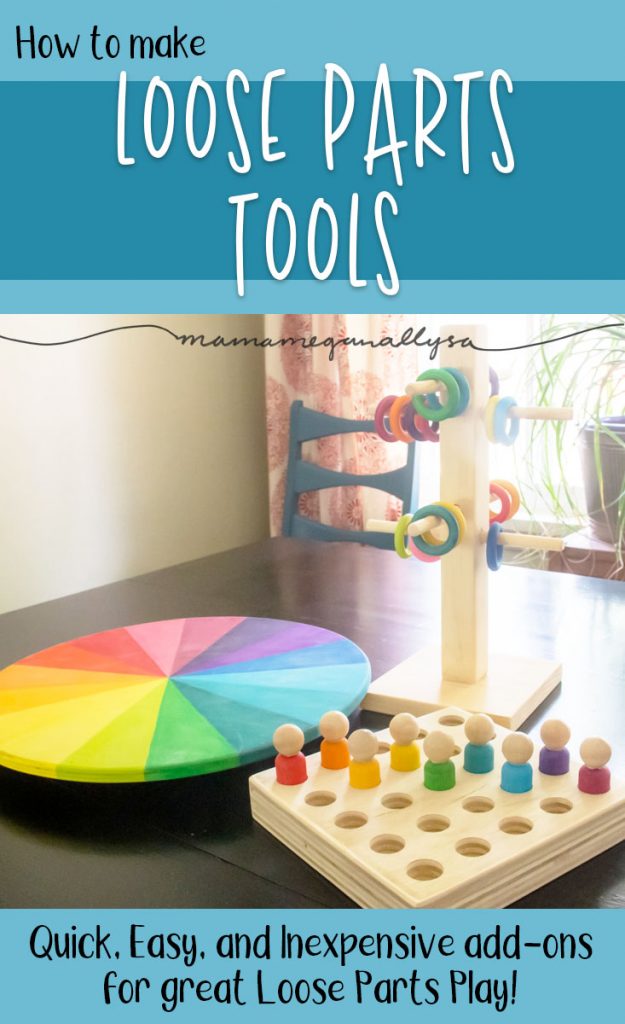
Our open-ended loose parts are probably one of Bitty’s favorite toys but with that said she is still quite young and often needs some kind of invitation to play for them. Enter our DIY loose parts tools!
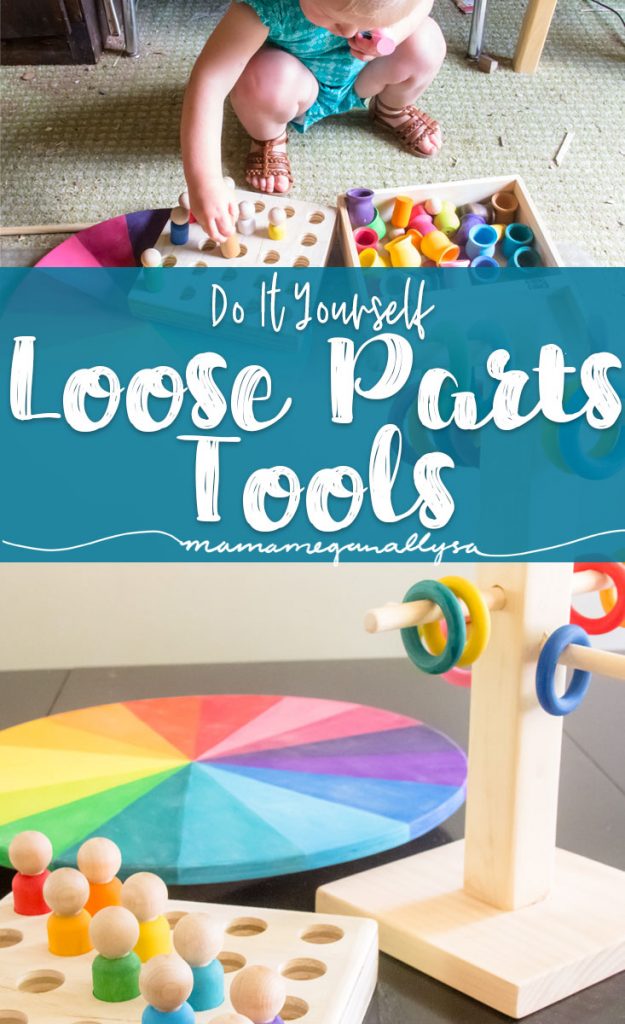
The most awesome part of loose parts is that they can fill any number of purposes in play, but often simply providing some loose parts tools, can spark imaginations for new ways to use the toys!
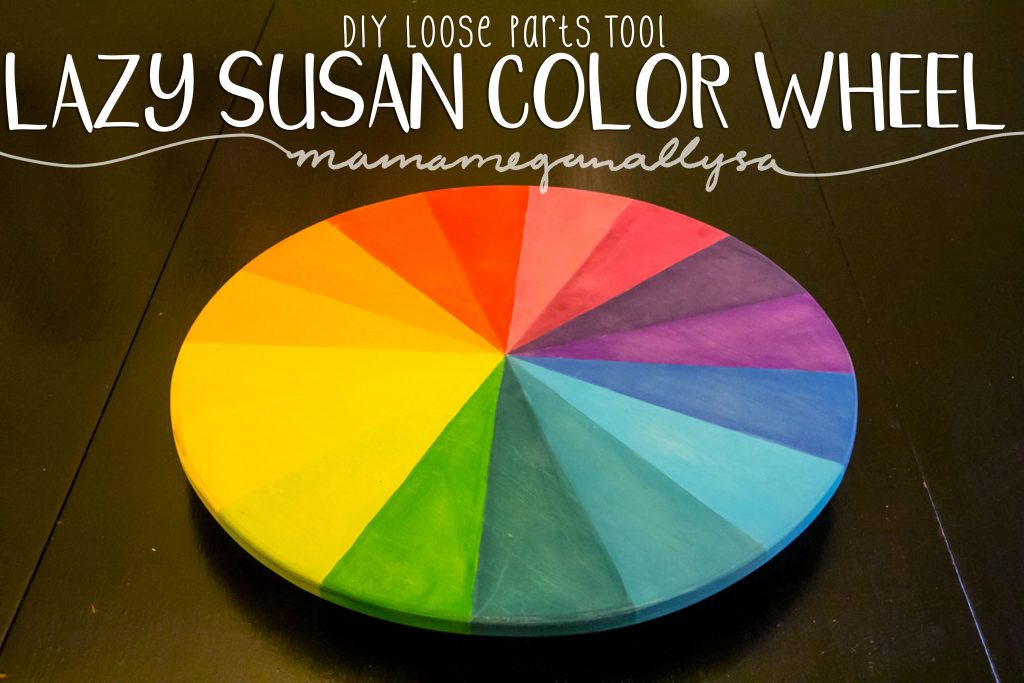
Loose Parts Tools : DIY Lazy Susanne Color Wheel
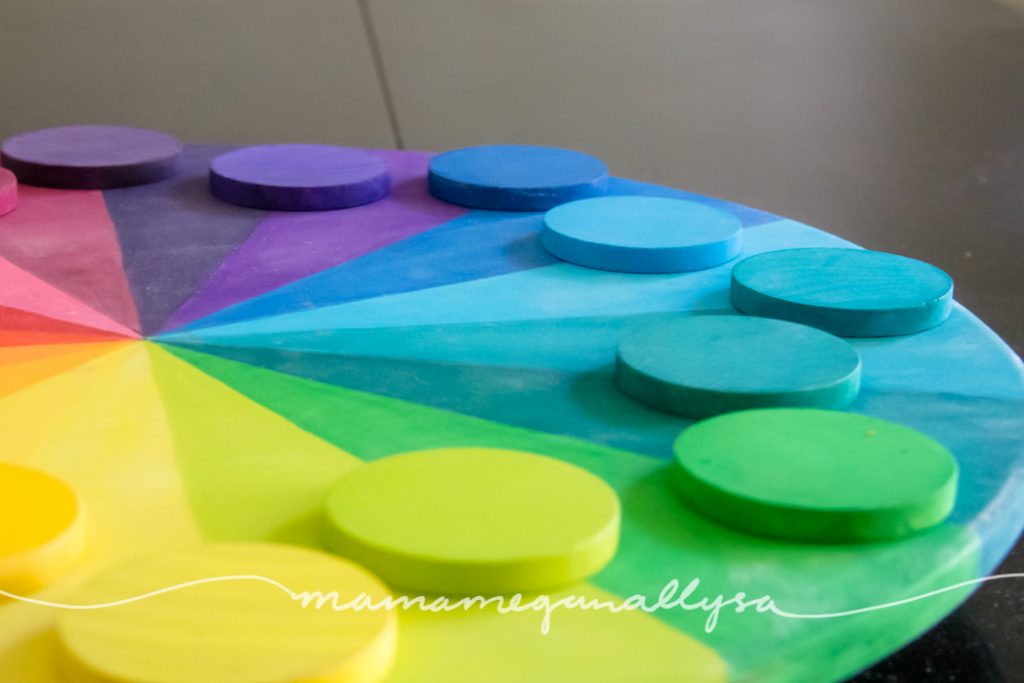
This project was 100% inspired by. She showed her DIY color wheel in her toy rotation stores and I just knew I had to make one. But of course, I couldn’t just go with the basic rainbow…I had to be extra.
The long road to a lazy Susan
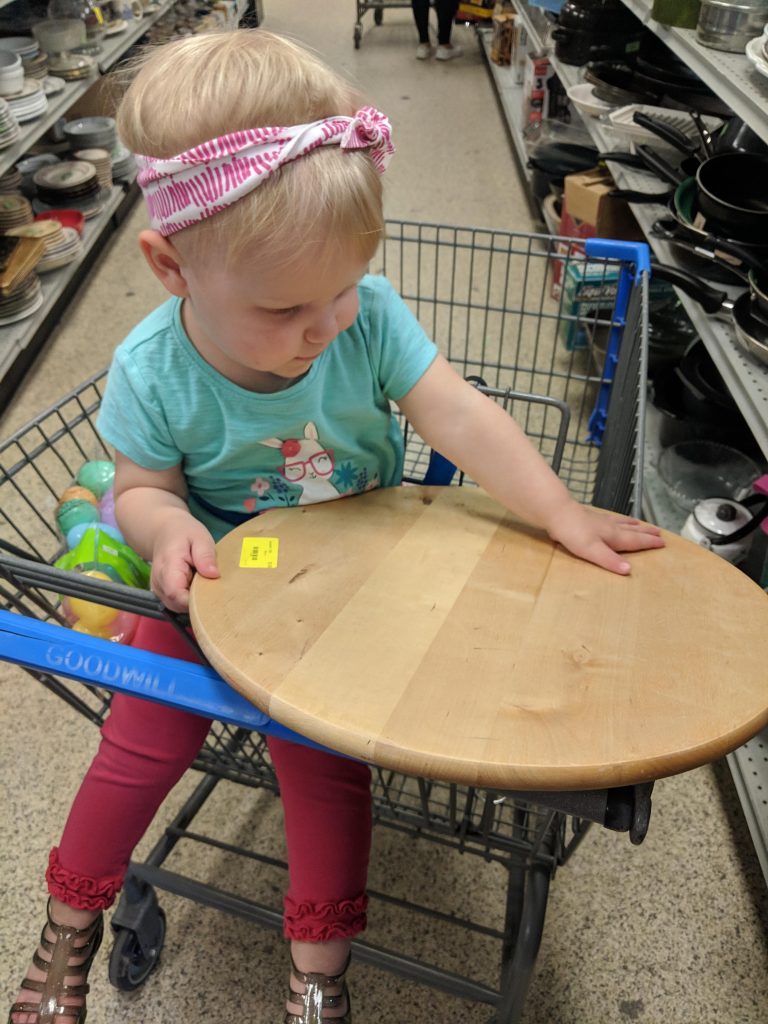
Lets back up just a bit. I started looking for a wooden lazy Susan at thrift stores months ago like before Christmas… I wasn’t having ANY luck. There wasn’t a lazy Susan to be found anywhere and when I did come across one it was plastic and not what I was looking for. I was determined to find a wooden one thrifted and I kept looking. Until we were home borrowing my Dad’s shop space and I just gave up and decided to make my own.
I cut out a circle of some Baltic plywood with a Jigsaw and brought it home to add to the project pile. And don’t know it, about a month after we got home…I found it. A wooden lazy Susan at Goodwill. So now I have two. Lol Tell me should I leave one wooden or should I paint it a simpler color wheel?
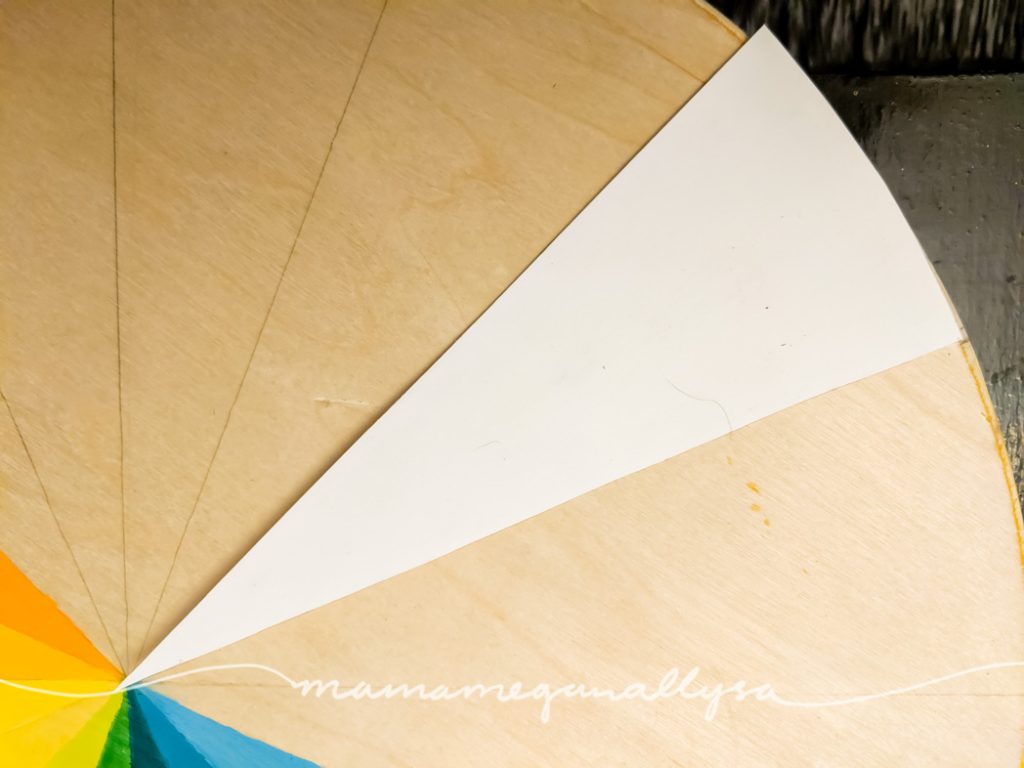
DIYS often require some math…
Let me remind you of something. Circles require fancy math. At least fancier math than I like to do on the regular. Finding a way to equally divide my circle into 17 pie slices was a challenge and I will be the first to admit it isn’t perfect.
I created a paper template that I used to draw my guides of the board and then preceded to paint. The first couple of triangles I used painters tape and that was just more work than it was worth. I found that I had a steady enough hand and I just used my pencil marks as guides and went for it.
Then it was time for hardware. I’m not going to go into detail about how to do this, mostly because I didn’t do it, and I couldn’t tell you if I wanted too! Zak handled this for me after we found this YouTube video.
According to Zak he doesn’t ever want to do it again as it required A LOT of math to find the right attachment points, and it’s still is ever so slightly off center.
This post contains some affiliate links. As an Amazon Associate, I earn from qualifying purchases. I may receive a small commission from if you follow and decide to purchase. There would be no additional cost to you!
Supplies you will need for a DIY color wheel
- Baltic plywood or some other large sheet of wood
- Jigsaw for cutting the circle out
- Paint and paintbrush
- Lazy Susan hardware
- Smaller pieces of wood for the base
- Small screws
- Phillips screwdriver – powered is fine but you might need a manual as well
- Drill bit
- Ruler
Open Ended Losee Parts Tools

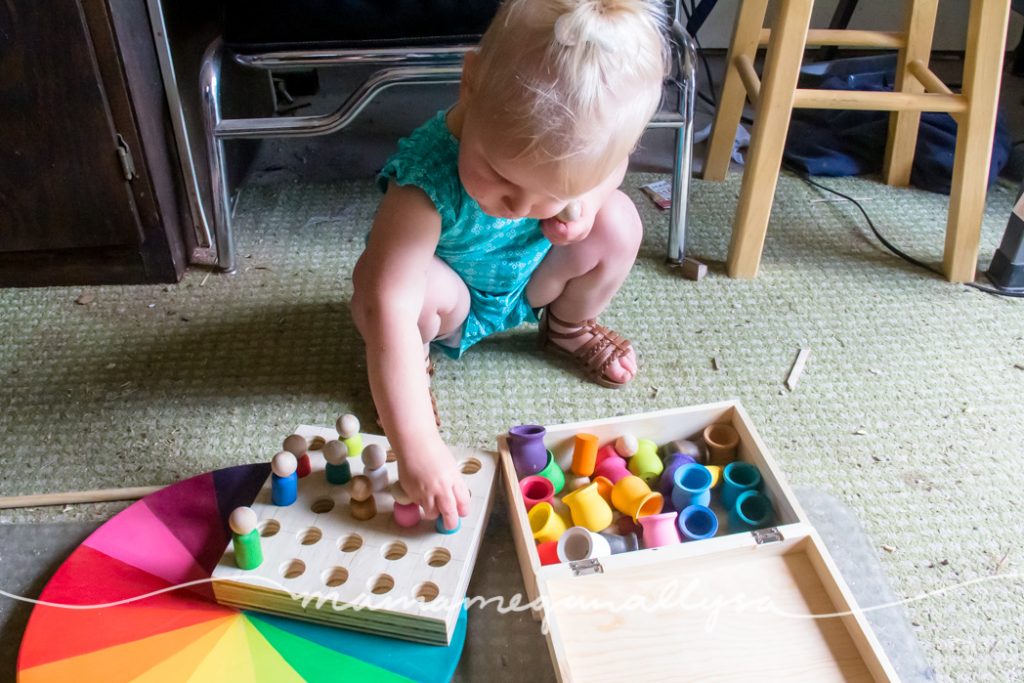
There we have it a Lazy Suzan color wheel for all sorts of color sorting and pattern play and general colorfulness! This is the least specific loose parts tool I made this time, no specific purpose just cool looking and fun to explore!

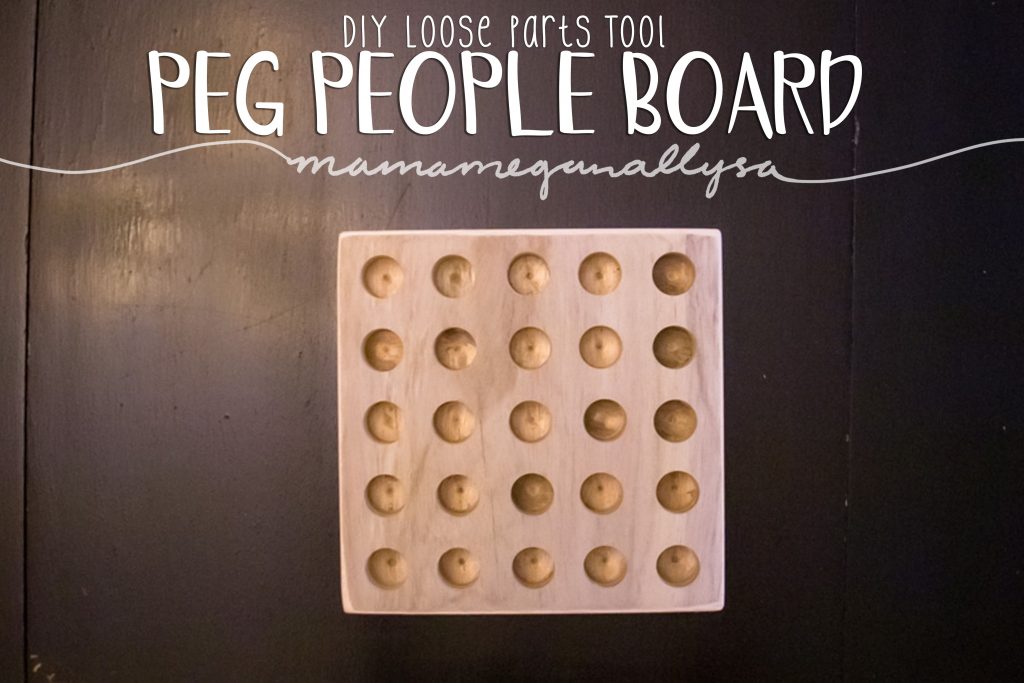
Loose Parts Tools : DIY Peg People Board
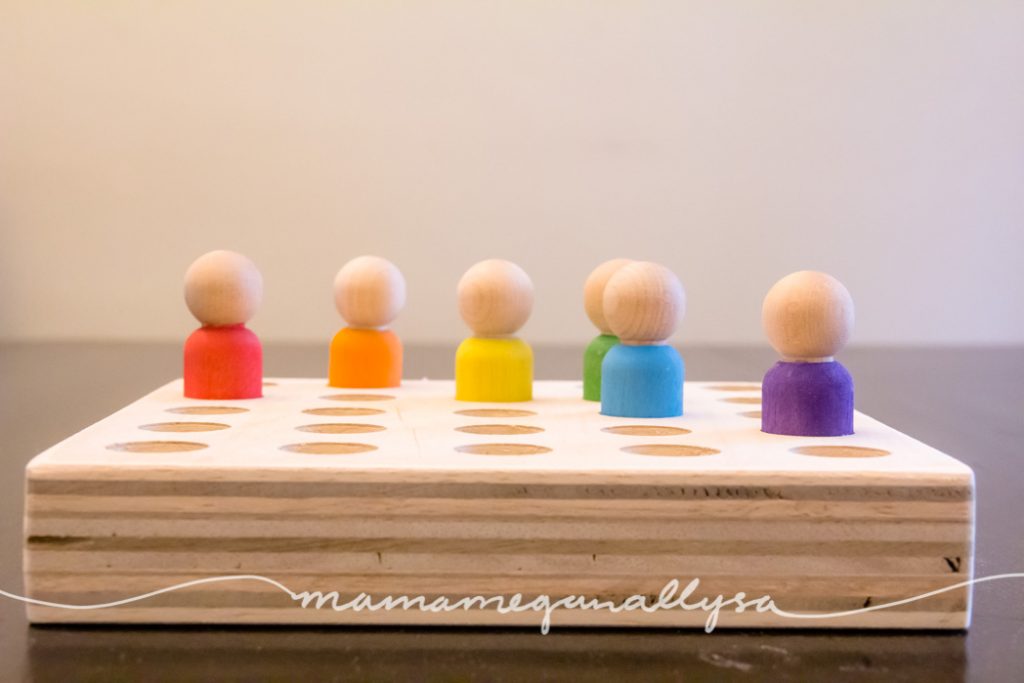
I can’t quite figure out what to call this loose parts tool. It’s sorta like a pegboard. Except the holes don’t go all the way through. I made it for another way to play with her peg people.
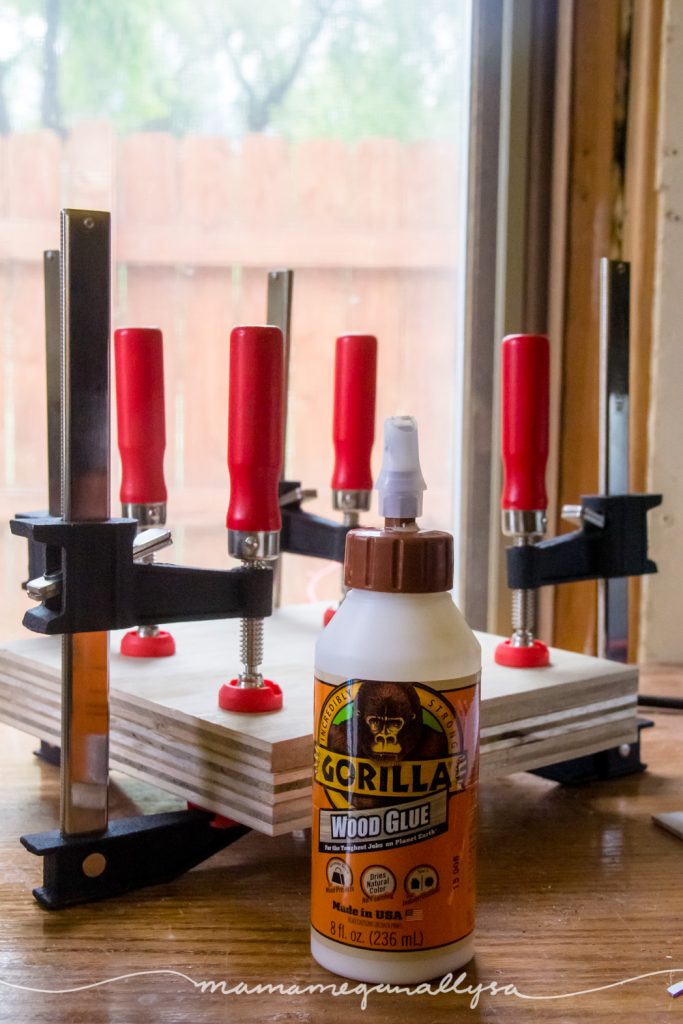
This project started by gluing some plywood together to get the thickness we were after. I wanted the body of the people to still stand above the top of the tray. We ended up with three layers total but the holes will only go through the top two. We clamped and left that to dry overnight.
More DIY loose parts tools math
We had done the math beforehand that I wanted a 5×5 grid and each hole to be an inch and half apart with a little space around the outer edge. Our board ended up at 8 inches by 8 inches. Then I drew out the grid so that we would know where to drill. I punched a little hole so that the arbor bit would be easy to line up and we were ready to start drilling!
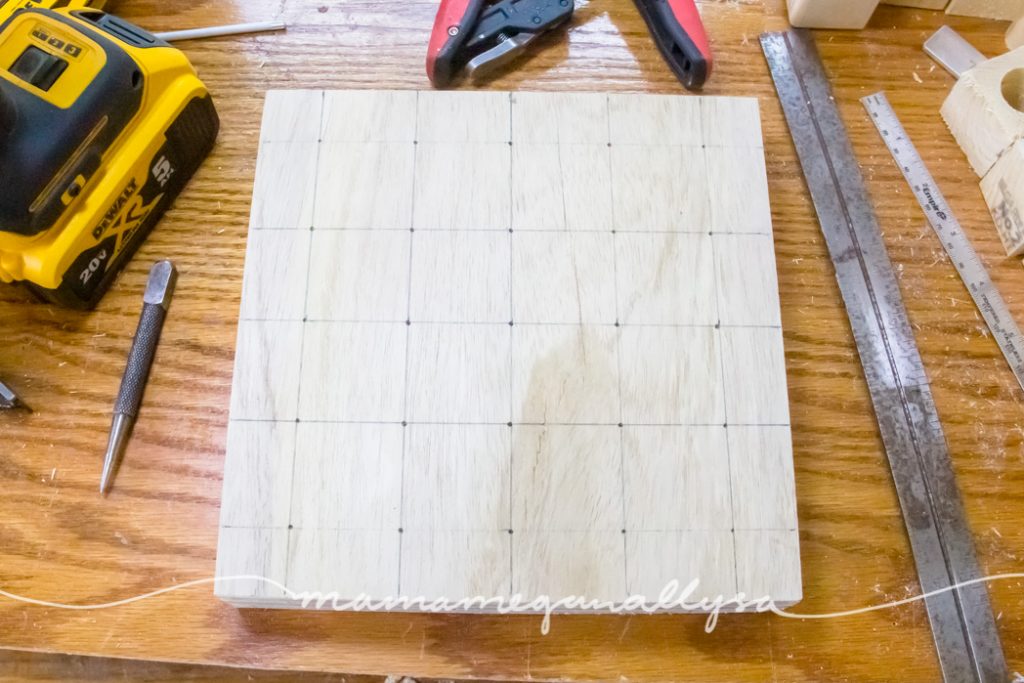
Zak had set the drill press to only drill as deep as the top two layers then it was a simple process of drilling at each cross point of the grid.
Sanding it smooth
After we were done with the drilling we changed the bit for a drum sander and sanded each hole. This served double duty it smoothed things out and got rid of splinters and it also gave each hole a little wiggle room as the drill bit and the peg people are the EXACT same size so there can be some sticking and too tightedness. By sanding away just a little bit it allowed the peg people to slot in nicely and then not get stuck!
I then took the orbital sander to the whole thing to smooth the corners and get rid of any roughness on the surface.
Supplies for the Peg People Board
- Table saw – something to cut the plywood down
- Wood glue
- Clamps
- Ruler
- Drill press
- Arbor bits
- Drum sander bits
- Orbital sander
Simple loose parts tools for the win
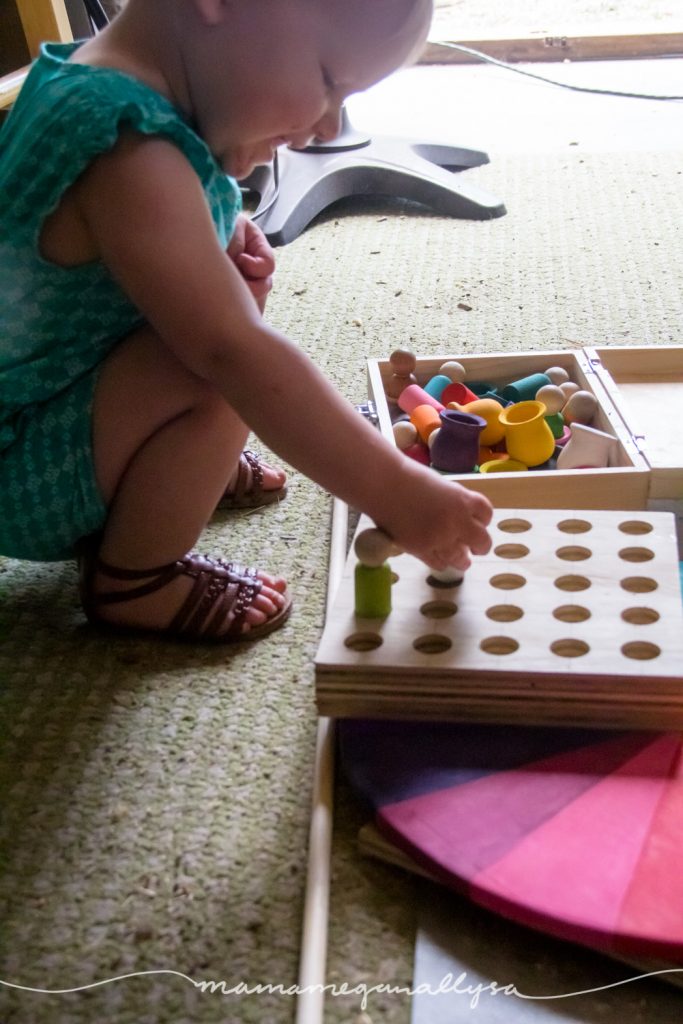
This was an immediate hit with Bitty. I showed her that the people fit and she proceeded to find every peg person we have and add them onto the board. This is a great invitation to play as well as a fine motor activity to control where the peg people go. This loose parts tool can also be used for patterning or color sorting. What other fun ideas can you think of to do with this board?!
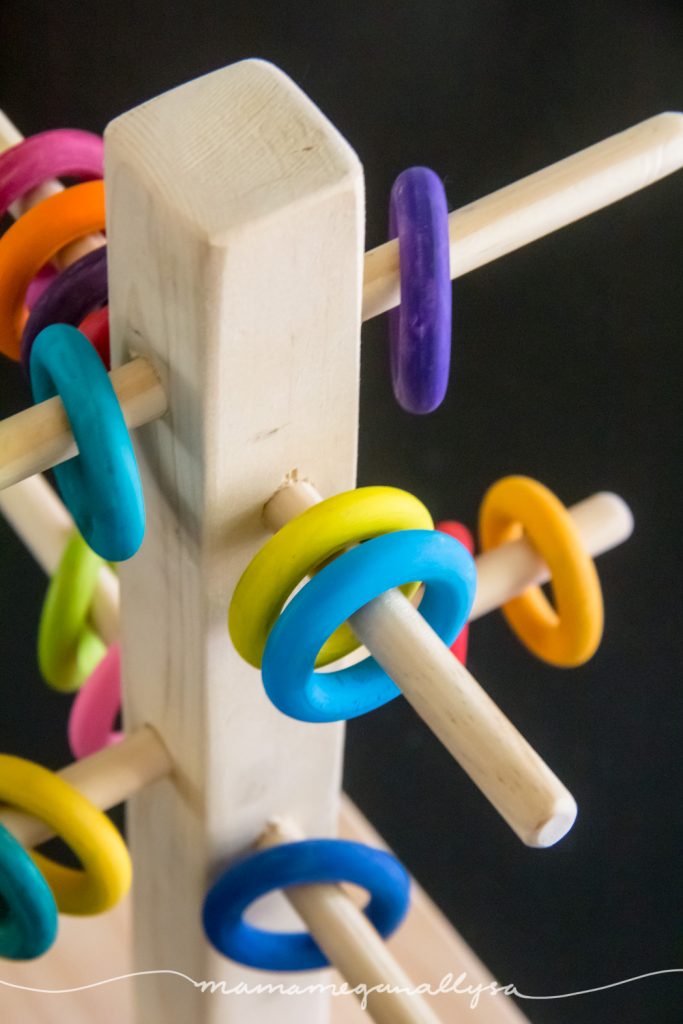
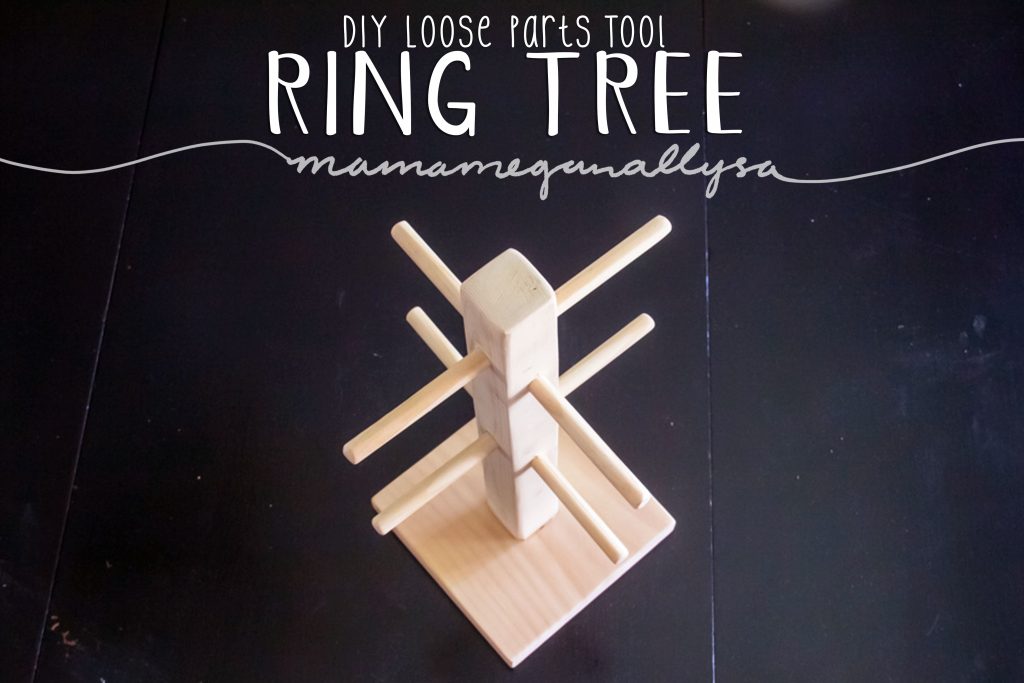
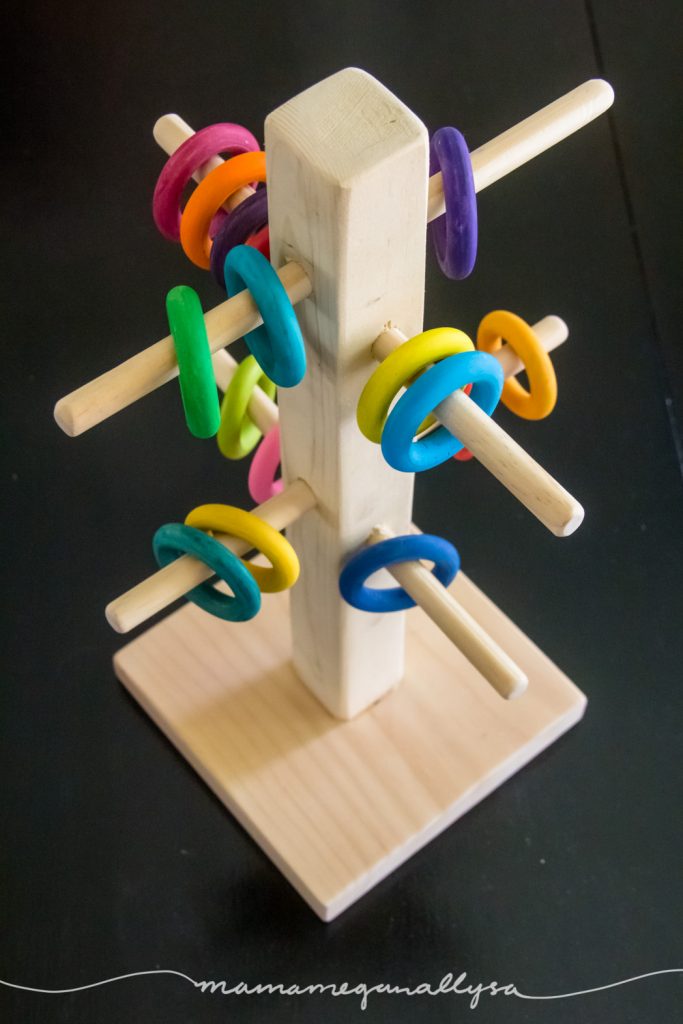
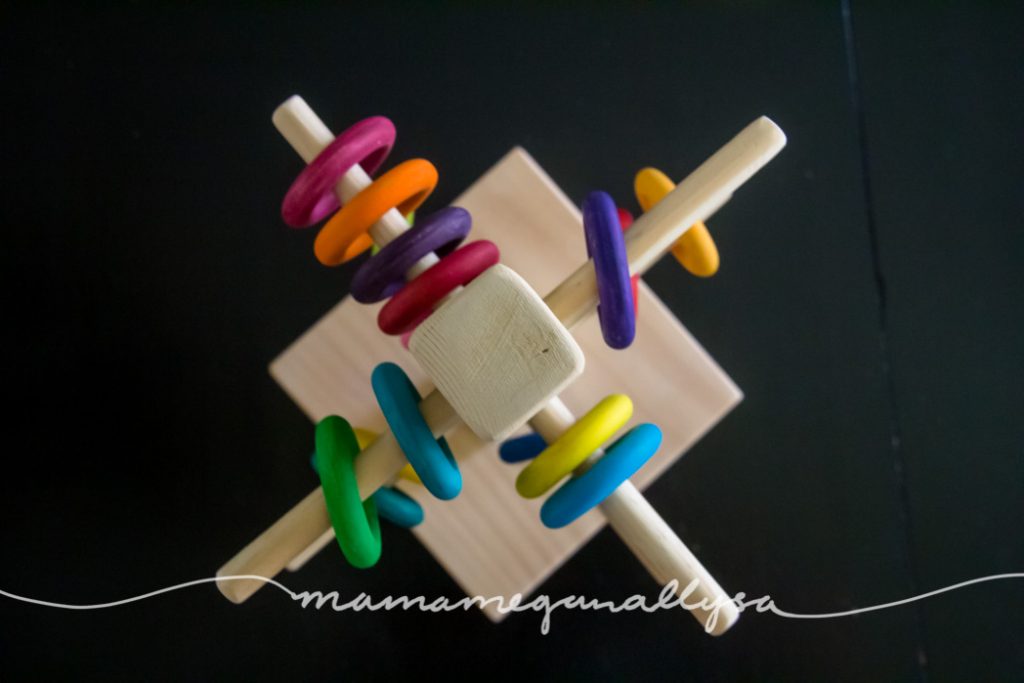
Loose Parts Tools : DIY Ring Tree
I have been on the hunt for a mug tree. You know the thing you can stand on your counter and hang coffee mugs off of? Again I was determined to find it used. I have not had any luck so I gave up (watch I find one next week) So we picked up a couple of dowels and gave it the old college try.
I say that because, this project kicked our butt.
DIY loose parts tools Pain and Frustration
We tried half a dozen times to try and get perpendicular holes drilled in our big dowel and it was just not our day. All of that culminated in Zak attempting to build a jig and having the table saw kick the wood back at him and I won’t go into details but there was blood and he’ll be hurting for a few days. (nothing too serious, don’t worry)
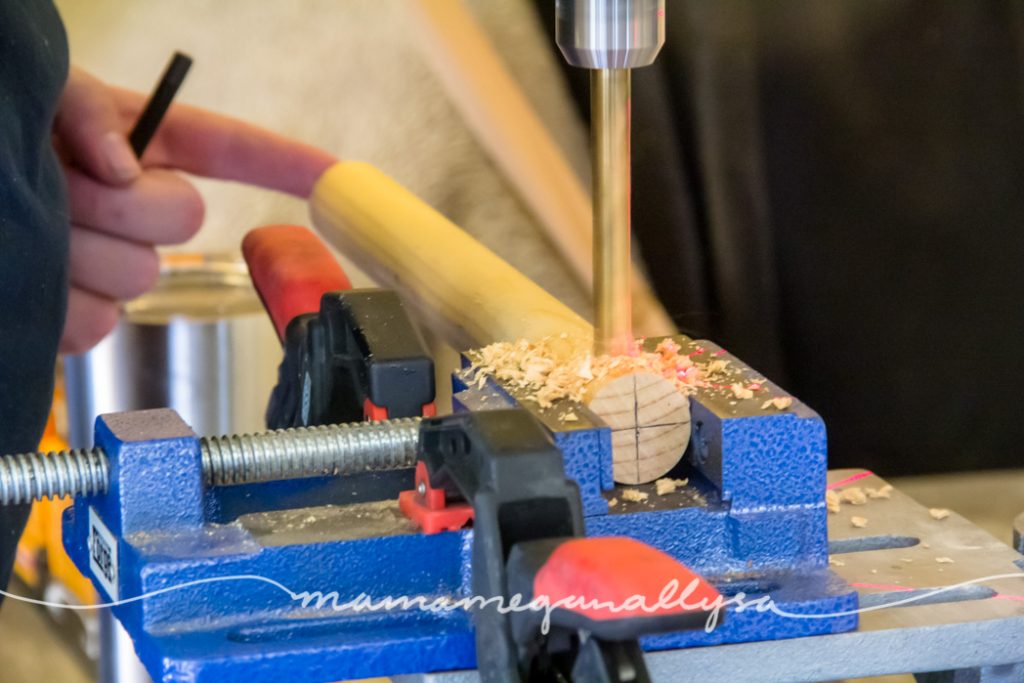
Starting fresh with revamped plans
So day 2. We altered plans. Instead of using a large dowel as the center we used a 2×2 Flat sides are easy to find the center on and subsequently drill straight through. After some more math and measuring we ended up with two sets of two holes drilled through the 2×2, a cross set anchored closer to the top and then another cross set about 5 inches lower. I gave this a sanding at this point, as I knew it would be easier to do now versus later.
We attached the base with wood glue and clamped together and left that to dry for a few hours and then added a screw for extra support.
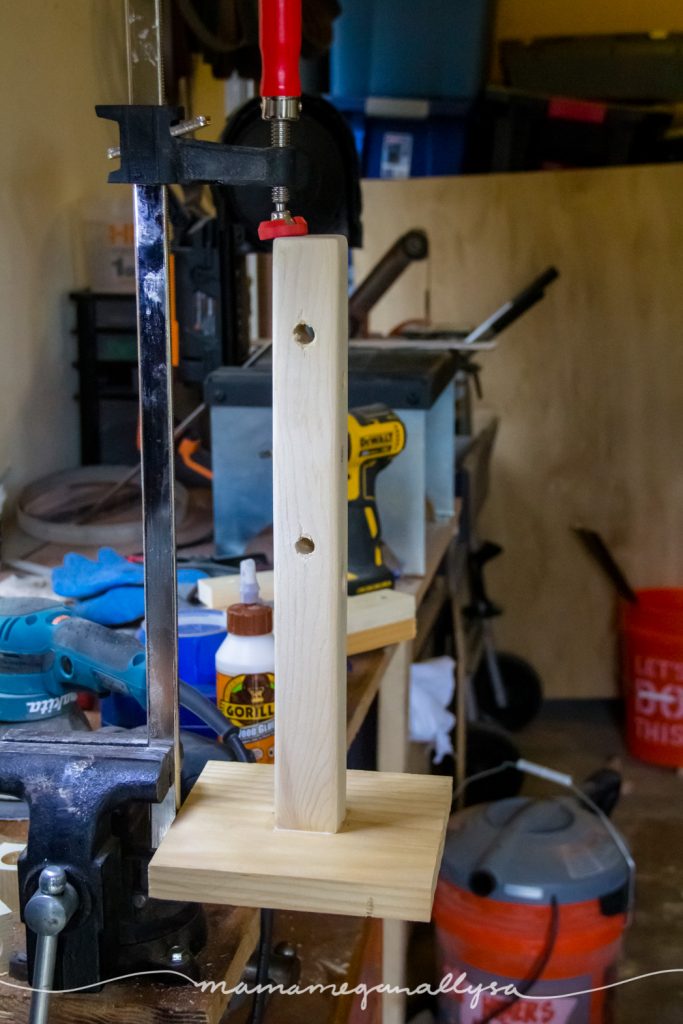
Then we took the smaller dowel and decided how long we wanted each rod to be and just cut than with the Miter saw. We added some wood glue to the holes in the base and hammered the dowel into place. (again the drill bit and the dowel were the exact same size so things were a little tight, but that’s in our favor this time) After the first one was in, we measured each side to make sure it was center and then just made a mark on each of the other rods so we would know when to stop hammering.
When everything was in place I sanded the edges of the dowels and the base and it was good to go!
We over complicated it
This loose parts tool was much harder than it needed to be. Once we switched to the 2×2 it was super easy! Learn from our mistake or heck teach us if you figure out a way to use the dowel!
Supplies you need to make a DIY ring tree
- 2×2
- small dowel
- miter saw could hand saw if you wanted
- drill press/drill bit and screw gun
- wood glue
- clamp
- ruler
- screw
- hammer
Loose parts tools spark creativity
I am looking forward to watching her rearrange the rings and find other things she can hang off it! I may have to dig out some old bracelets and see what she does with those! Do you have any ideas of other things I could set out for her to try?
Simple Weekend Projects
I started with three new loose parts tools but have plans for so many more! Let me know if you would like to see some other DIYs. There are also plans for some loose parts tools for her wooden balls and coin rolling around in the back of my brain.
In the end, these were all fairly simple projects especially when we are smart and take the simpler way. We were able to get them all done in a weekend with time to spare. I suppose except for the painting of the lazy Susanne, that took place over a few evenings to allow for dry time and such.

Loose parts tools for all our loose parts
What kind of loose parts tools do you add to your kids play time? I am really looking forward to the addition of the pegboard. Did I spark any creativity in your loose parts set up? I would love to see what you use to play with them!
If you want to follow along all of our fun invitations to play make sure and follow me on Instagram and if you want to know more about loose parts play among lots of other great content(if I do say so myself) check out my Pinterest!
I would also love a really good divided tray. Wish me luck as I continue to hunt the thrift store shelves for that baby!
Other posts you may like


Hi there,
I just stumbled upon your blog through Pinterest and saw this post. How fun are these! I was curious what kind of paint you used for all your toys? I can never seem to find any that are not toxic because my kiddo still puts everything in his mouth. Thanks for sharing these great ideas! We have drilled holes through a dowel and if I remember right we just used a regular old hand drill and a clamp. Sorry you had such bad luck! I like the square shape better though, it’s adds some visual appeal with the rings.
Right now I am just using acrylic paints that I have watered down to allow the wood grain to show through. I was very lucky that my daughter was never a mouther so it didn’t even cross my mind to look for non-toxic paints! They do exist, I just haven’t used them! Thanks, we tried everything and were just having the worst time! It all worked out okay in the end obviously! lol
I love this! That rainbow lazy susan is such a great idea! You really inspired me, thank you. 🙂 I was looking for a secondhand mug tree, since the one from Ikea doesn’t seem to be available anymore. Didn’t have any luck with finding an all wooden DIY either. I stumbled onto your post through Pinterest. Guess I’ll be making my own now!
Please post the other DIY’s you come up with. <3
Thanks so much! I feel like I searched forever and right after I gave up I stumbled upon one. It can be done but boy you’ve got to be patient! Good Luck let me know if you make one!
what size rings are those?? thanks for the post! genius!!!
They are 1 1/2 inch rings. The inner opening is 1 inch. So glad you enjoyed it!
I was lucky – one of my friends found a wooden mug tree for me at a second hand store. We used napkin rings of various kinds, and later some tube things from who knows what. When I presented it to my granddaughter and her friend I had to send all the older kids into the kitchen so the toddlers had a chance.
Later, I let the older kids have their turns. And for a while, a mixed group of kids played with it. They eventually devised a contest to see which napkin rings could roll the best. The toddlers loved that game too.
So great! I love that loose parts play is great for kids of all ages!
Hello,
Would you tell me how tall is the 2 x 2 you made for the tree ring?
Thanks.
Steve M.
What size are the holes for the pegboard?
It really depends on what size dowel or peg person you are planning to use with it. I believe mine are 1 inch.
Hi I love the color wheel, how did you decide which colors to put on it?
Thank You! I tried to stick to basic rainbow order with a ROYGBIV with the inclusion of pinks as well I tried to have in between shades like a bright yellow-green in between yellow and green! I hope that helps!