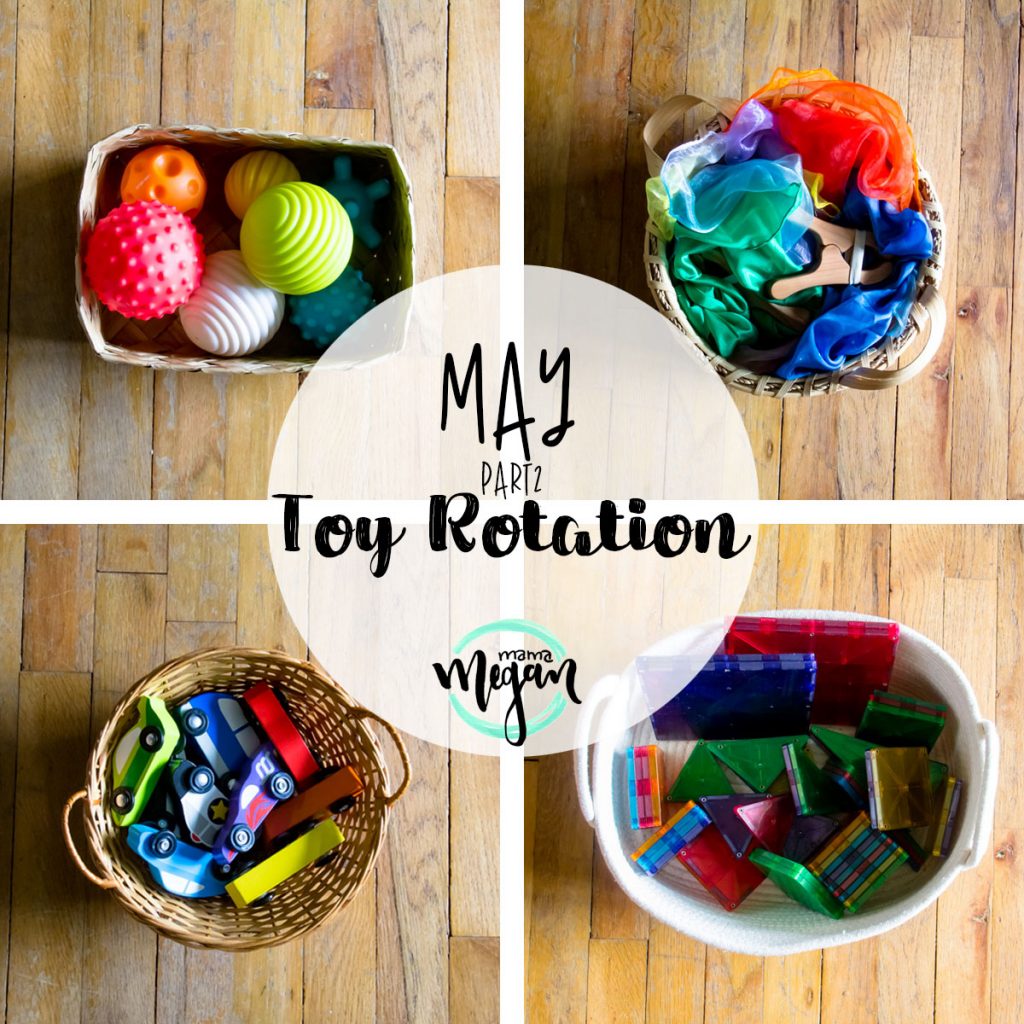
This weeks toy rotation came together really easily! I think the trick of always having out the animals, some kind of loose part play and the play silks was the trick! It made it really easy to fill the remaining gaps in her play shelf
This post contains some affiliate links. As an Amazon Associate, I earn from qualifying purchases. I may receive a small commission from if you follow and decide to purchase. There would be no additional cost to you!
LIVING ROOM TOY ROTATION
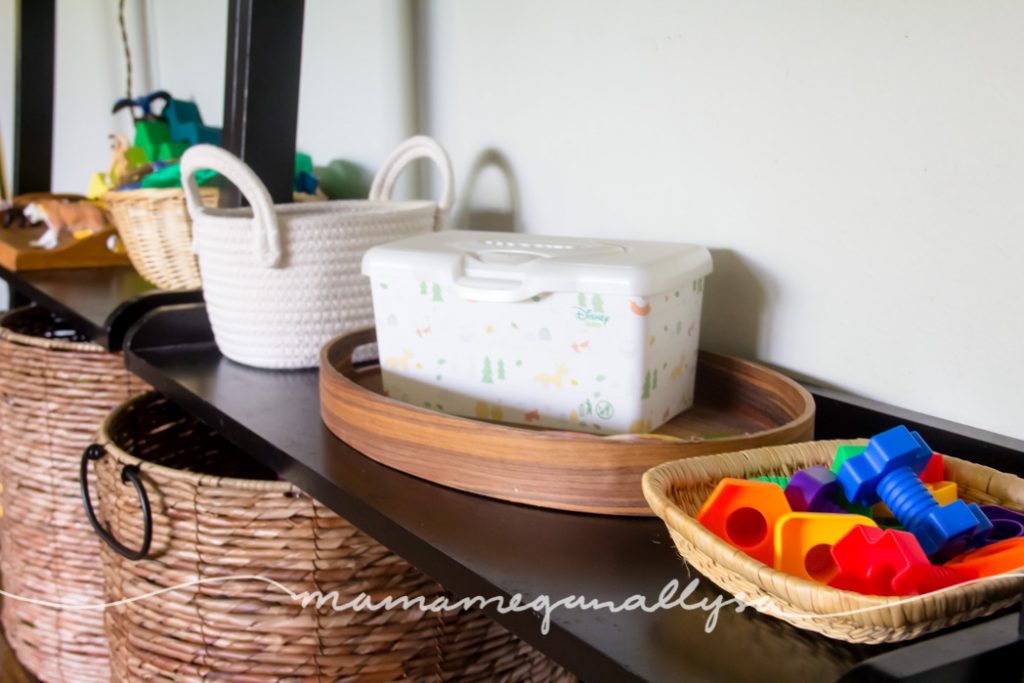
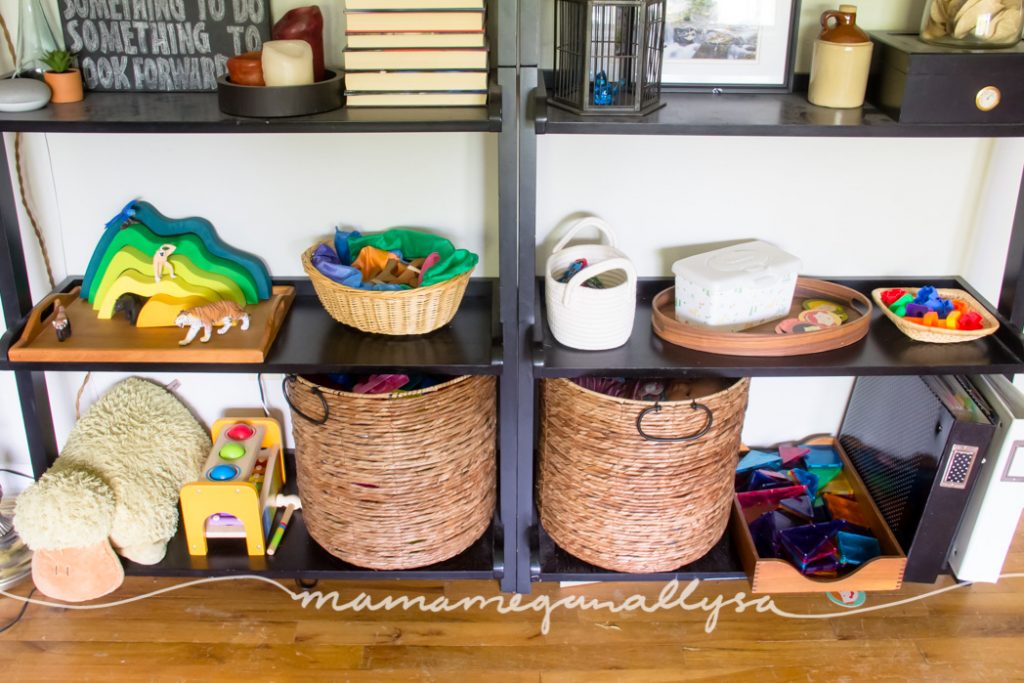
If you’ve been following along with our toy rotations you know that the living room is the base of our operation and that these black book shelves are where we display 90% of the toys that we rotate.
I think its really important for kids to SEE their toys. That’s why almost everything is on a low basket or tray. They are put away and look nice on the shelf but everything is still visible and easily grabbed when she feels like playing.
Also the second shelf is right at her hight, she will often play right at the shelf I really like that it almost acts as another play table!
PUZZLE TABLE
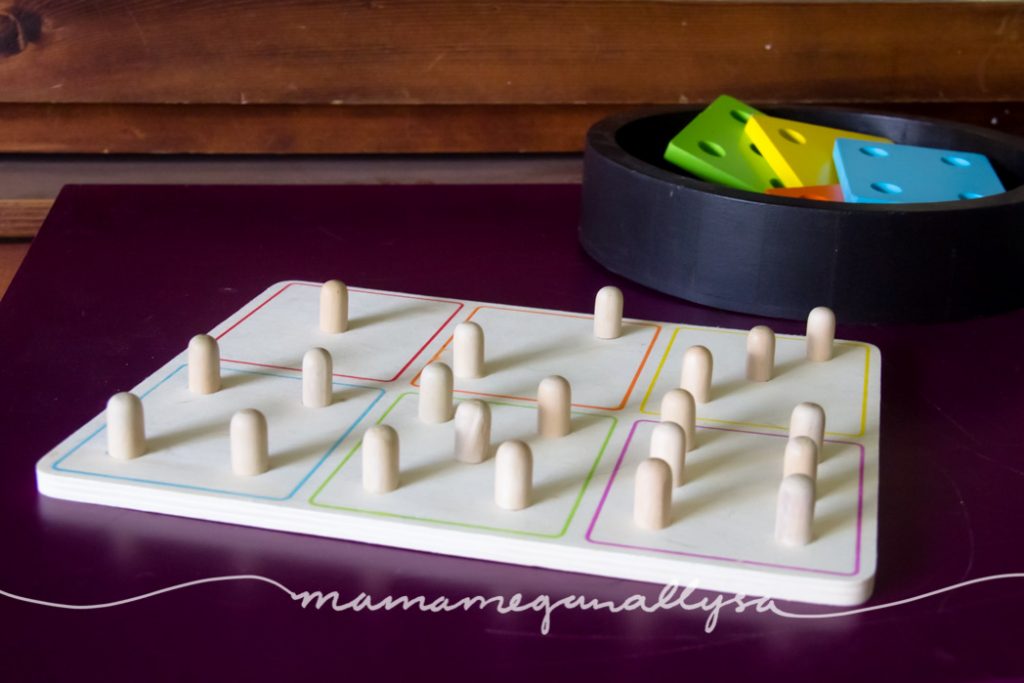
On her puzzle table, I have this dice style dots number puzzle. I think this is still too challenging for her to do but we haven’t had it out in a while. Who knows maybe she will surprise me! (she does every day!)
SIMPLE SMALL WORLDS
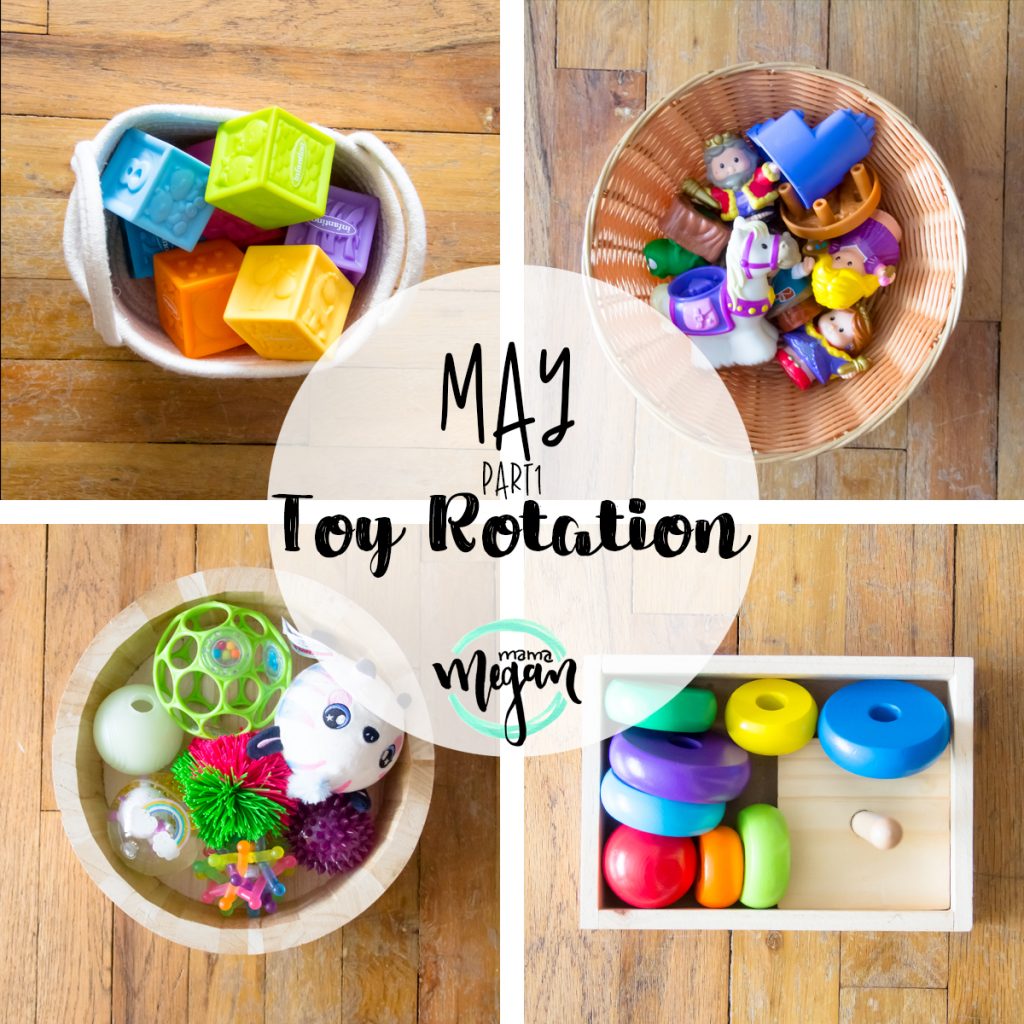
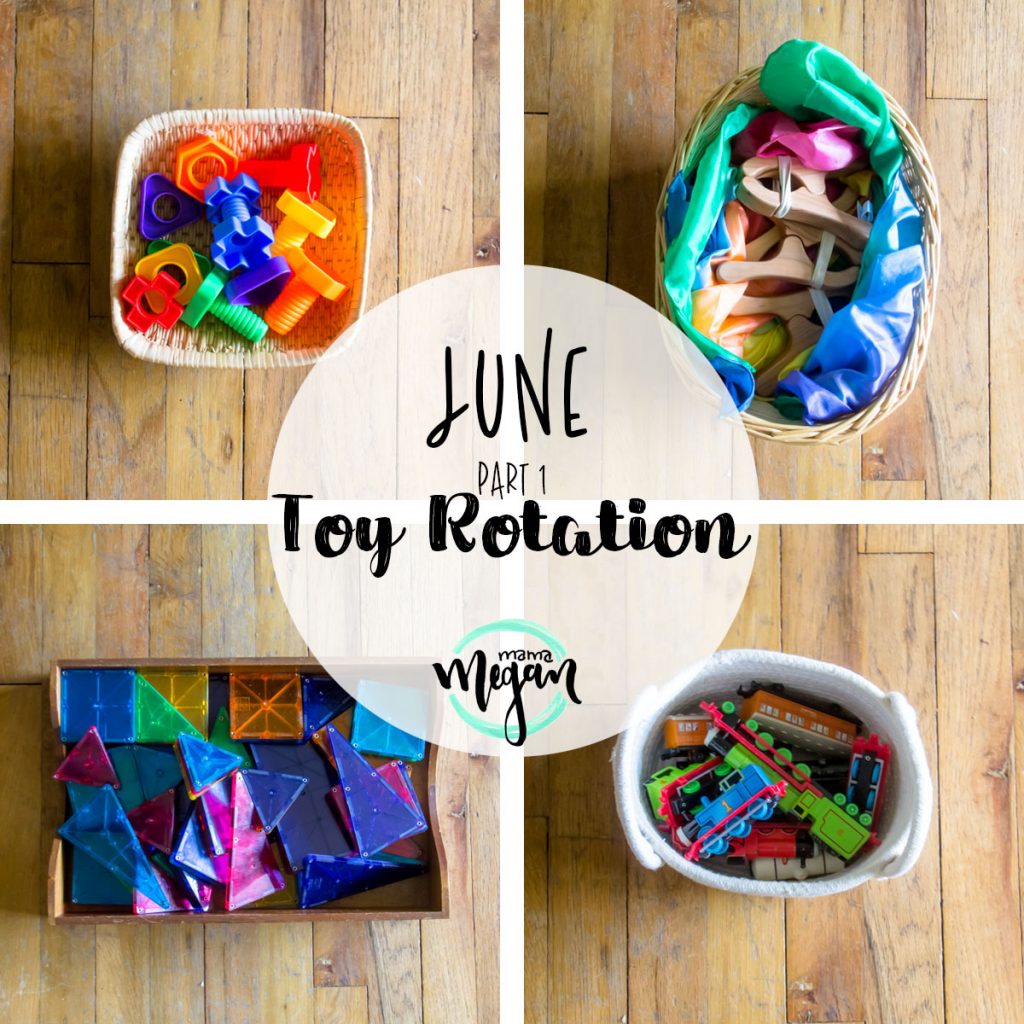
You may remember that I said last toy rotation that I wanted to start having some set of animals out all the time. This week we settled on some Jungle animals. We have the Bengal Tiger the Black Panther, a Gibbon and a Hyacinth Macaw, and the Red Panda (side note don’t come at me if these animals would never be all together in the same habitat…I am working with what we have!)
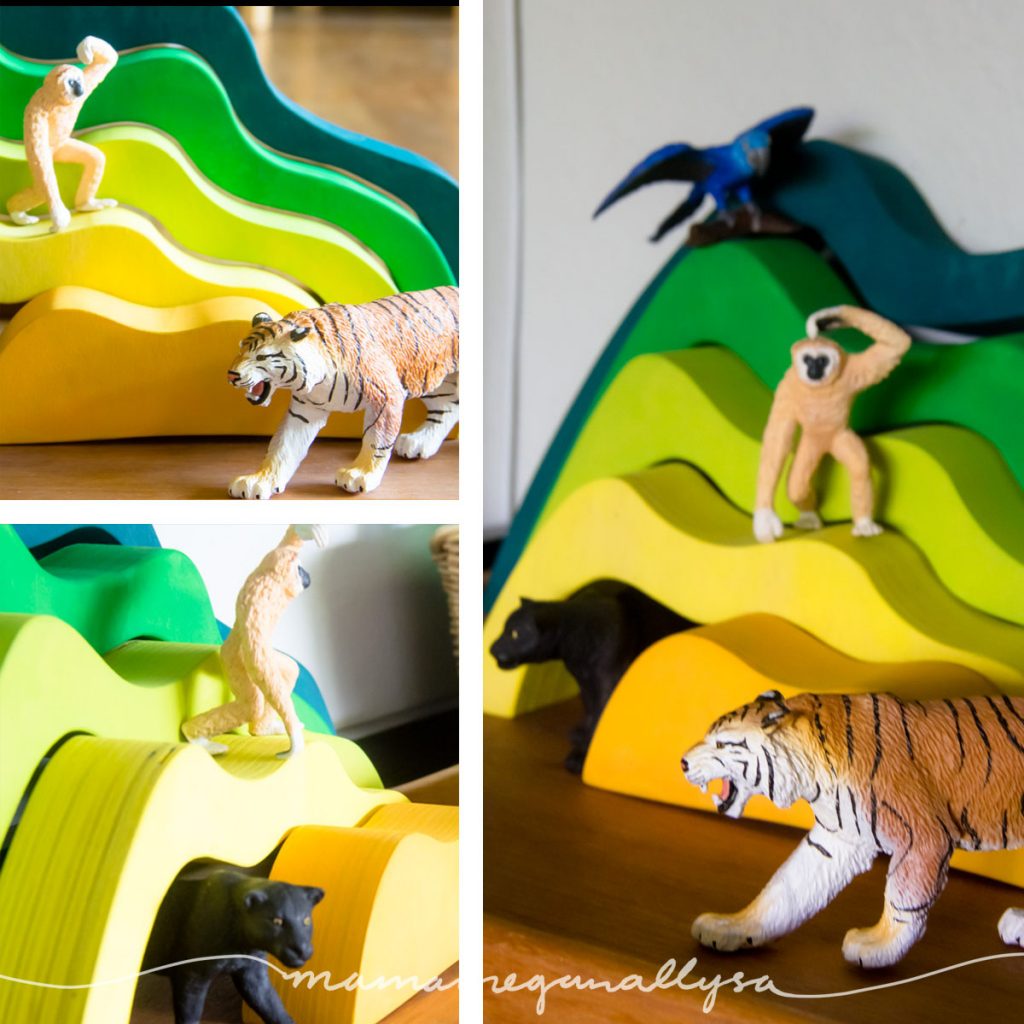

Also, let me introduce you to my homemade hill stacker. Very much inspired by our Grimms rainbow but a little chunkier and personally designed, cut and painted by yours truly! (I LOVE it soo much!!!) I thought the greens and yellows would be a nice backdrop for our jungle animals. Make sure and check back soon for a post all about how I made this stacker among others! 😉
DEEP DIVE INTO OUR TOY ROTATION AT 22 MONTHS
- These jumbo nuts and bolts are definitely challenging for her. She can get them started but then loses interest, and proceeds to get frustrated when she can’t just pull the nuts off. Its a learning toy for sure.
- We kept her Magnatiles out as a repeat toy this week. She has been enjoying these and while she doesn’t independently build with them she is starting to co-build! She also enjoys stacking all the squares together into one big mass.
- While her Lala and Grumps were visiting they reminded me that we had Zak’s old Thomas the train toys. After a little digging, we found them! These are vintage (can we say that if they are from the late 80’s early 90’s?!) and have had lots of love but they are also diecast metal are built to take a beating! We can hear a train from our house and she long been interested in trains so she has been loving these. I only wish the cars attached with magnets like the newer ones do as these old peg connections just don’t hold up to her very well…
- I plan on always having her Sarahs silks and clips out but this week I did put away the dance scarves. As our collection grows I plan on rotating the colors we have out, but for now, we have just the three and they are all out. (one for each of us during family dance parties ;))
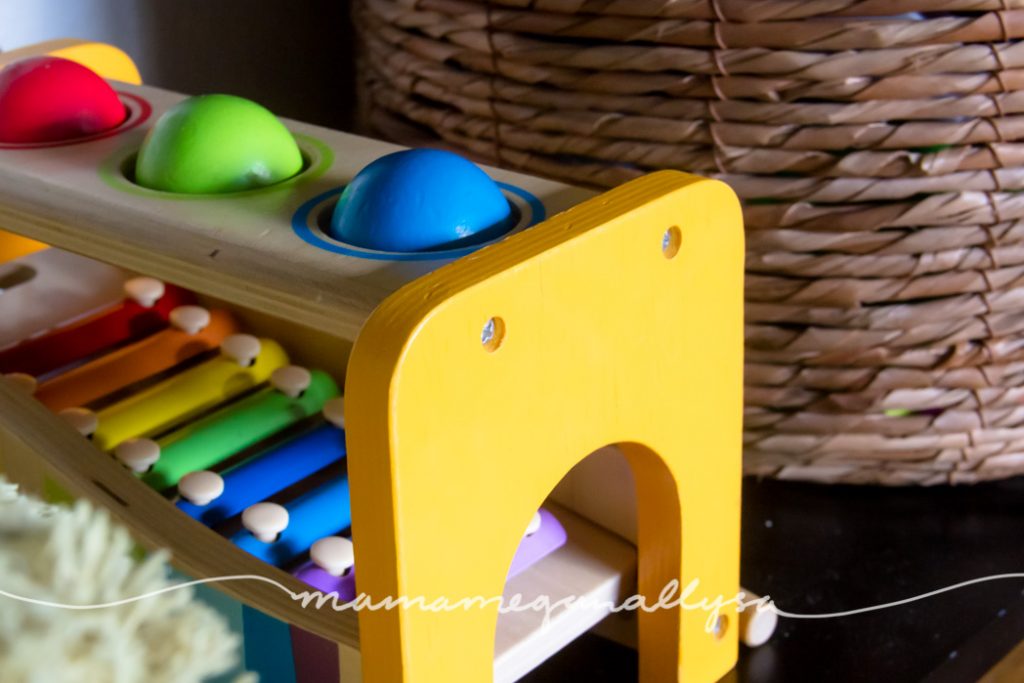
We also have her hammer Hape hammer bench out as well. Her favorite is still to pull the xylophone out and just play with that part but she is getting so much better at using the hammer to hit the balls through too!
LOOSE PARTS PLAY
For this weeks loose parts I wanted to have a posting activity. If you’ve never heard of this term, it simple refers to the process of inserting something into something else. Dropping coins into a piggy bank is a good example.
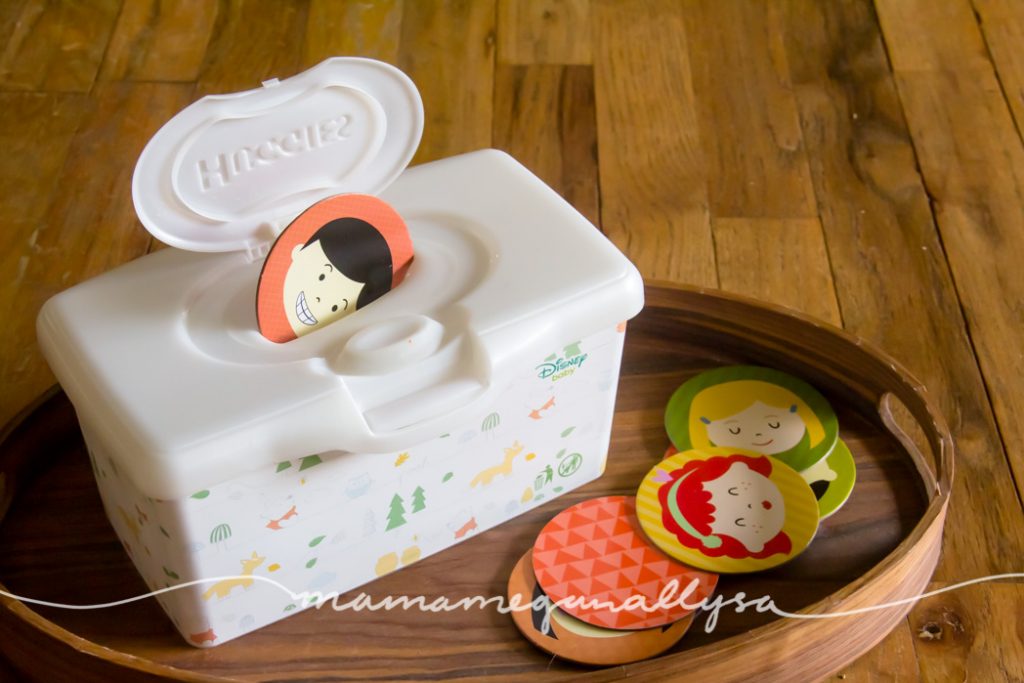
I had originally planned on using some of her DIY wooden loose parts for this activity but then remembered that I had just picked up an emotion matching game and that the cards from that would be perfect for this with the bonus of being able to talk about emotion (a skill Bitty currently has a very loose control on. We had the classic throw myself to the group fit the other day…hello toddler emotions!)

You can make a posting box out of anything! an old oatmeal tube or coffee tin. A kleenex box or an old Amazon box (you know you have one of those lying around!) We used an old wipes container. My hoarding pays off occasionally! Then depending on the age and fine motor skill of the toddler just cut the slot appropriately and make sure you have a way to get everything out again and there you go!
THE BIG BASKETS
Contrary to what I stated earlier about her toys being visible and on display on trays and shallow baskets…we have two types of toys that are kept in big deep baskets. Her baby dolls and her building blocks.
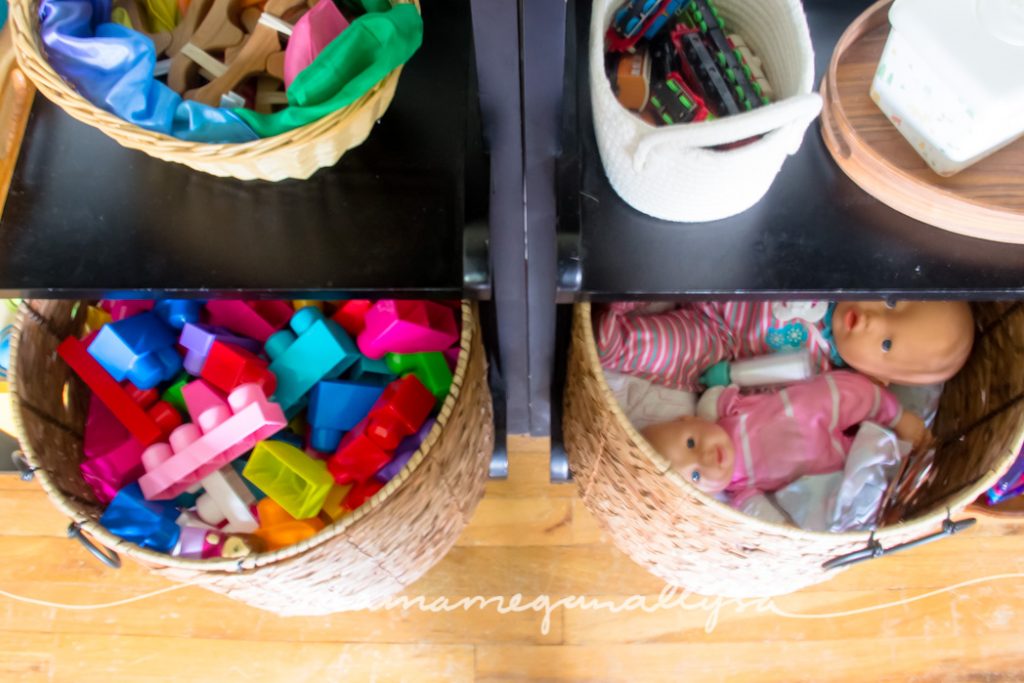
Part of the reason we do this is as these are VERY rarely rotated. So she knows what is in the basket without having to be able to see it. It helps too that when the baskets are pushed all the way in she can still see into them a little bit, so not completely hidden away! The other reason is that blocks and baby dolls (and everything that goes with them) take up a lot of space! Keeping them stored in our big basket just makes more sense for us!
A WINDOW INTO OUR TOY ROTATIONS

The living room window is amazing and it has been a favorite of Bitty’s from the day we moved in. (see what I did there?! haha)
We have the our DIY pickler still in front of the window and she has been LOVING it.
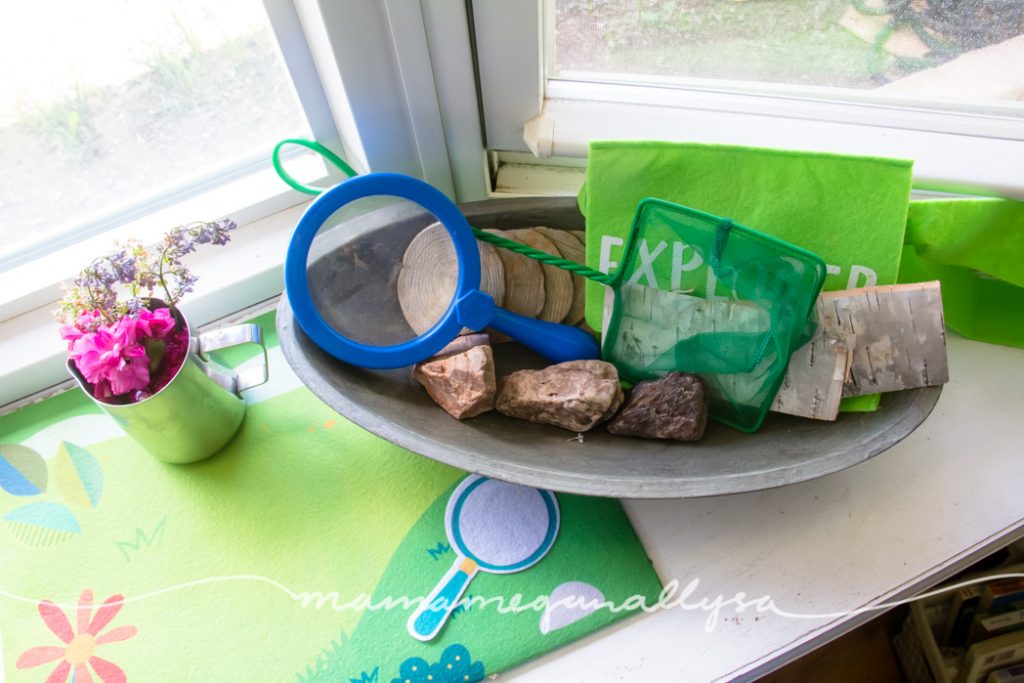
Also in the window sill is our discovery basket. This week we have a nature explorers kit. It has a magnifying glass, a net, a bag for her discoveries and then some wood slices, bark, and rocks to explore. The bag has definitely been her favorite this week!
TODDLER TOY ROTATION DISPLAY
Have you started doing a toy rotation yet? How do you display them? I know the Instagram community LOVES the Kallax cube shelf from IKEA. I can see how it would be nice to have the cubes to keep things contained but I personally feel like its a little claustrophobic… Our black books shelves feel more unique, not to mention they go with our style way better than IKEA and don’t foresee them ever leaving!
Do you use baskets? Boxes? Trays? Or do the toys just lay all over the floor (guilty of this by noon most days!) Comment below and tell me how yo display your toddler toys!